
Quick Answer: A faucet replacement is a staged visit, not a whole-house event. The water closes at the two stops under that one sink, so showers, toilets, and laundry keep running throughout. The stage that stretches longest is usually the old mounting nut.
Putting a faucet replacement on the calendar is agreeing to a visit with a fixed shape. The honest answer to how long it runs is that the faucet does not set it. Two stages do. The first is whether the shutoff valves under the sink close and stay closed. The second is whether the old mounting nut comes off its shank. Every other stage takes about what it takes, every time. A plumber can put a time on the visit once the cabinet is open and those two have been looked at, and not with any confidence before that.
The water closes at two small valves under that one sink. Nothing else in the house loses pressure. What follows is the visit in the order it happens, so you can tell, while it is going on, which parts are normal and which parts are a plumber working around something.
The Shutoff Comes First, and It Has to Hold
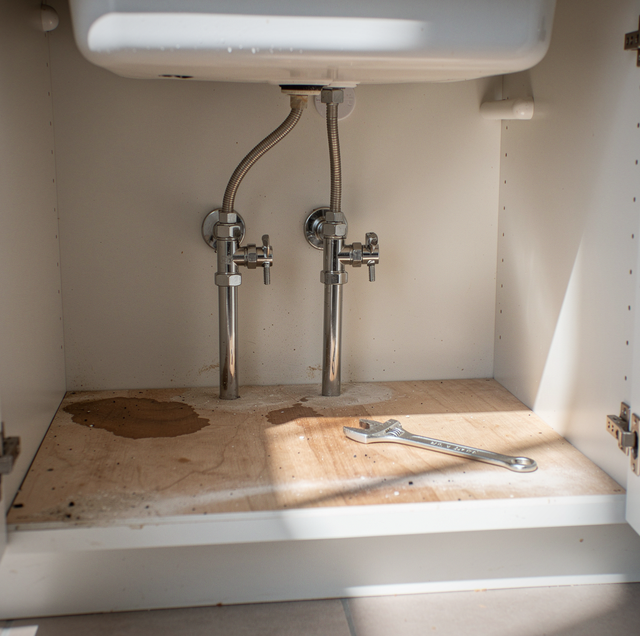
The first thing a plumber does after setting his bag down is not to touch the faucet. It is to reach into the cabinet, close the two angle stops, one on the hot riser and one on the cold, then stand up and open the faucet at the sink.
That pause is a test, and it is the one stage of the visit whose outcome is not up to the plumber. Every other step is work he controls, done at a pace he sets. This one is a reading. The valve either closes or it does not, and the answer belongs to the valve. What he is watching for is the spout going dry and staying dry. A spout that keeps dripping long after it should have quit, or holds a thin run that never gives up, has answered for itself.
If the flow stops and stays stopped, the entire job lives on those two valves. Your shower still works. The toilet still fills. The washing machine still runs, because nothing upstream of that cabinet has been touched.
If a stop will not hold, the water has to come off somewhere further back while that valve is dealt with, and that is a stage the visit did not start with.
Whether a plumber recommends fitting fresh stops while the cabinet is already open is its own conversation and its own article. So is the separate emergency of a stop that fails at the moment you need it closed.
Clearing the Cabinet Is the Part You Control
This is the one stage you can finish before anyone arrives, and it pays to do it properly.
Take everything out. The dish soap and the spray bottles, the sponges and the bags, the trash pull-out, the bin, the box of dishwasher tablets. Not pushed to one side. Out, and preferably out of the room, because whatever ends up stacked beside the cabinet becomes something to step over.
The reason is physical. The plumber works on his back with his head and shoulders inside the opening and both arms up over his face, holding a light in a space he cannot look into directly. Anything left inside is something to work around with tools he is running by feel.
Take out the mat or shelf liner too, not just the bottles. A bare cabinet floor lets the plumber see the wood, and a dark ring or a soft spot on the base means something under the sink has been weeping.
With the cabinet empty, the base is covered with a pad or towel, and a shallow pan is placed under the stops. That pan is not a precaution. There is water sitting in the lines above those valves, and it is coming out in the next stage.
Disconnecting the Supplies Brings the Standing Water Out
With both stops closed, the two risers between them and the faucet are still full, and so is the faucet body above. Opening the faucet at the sink lets air in at the top, so the water can flow out rather than remain in place under vacuum.
Then the connectors come off, one nut at the stop and one at the faucet shank above it. What comes out is not much, but it lands on the plumber's face and forearms, which is why the pan goes in first.
Water standing in the hot riser and in the faucet body can still scald when a connector is opened, even with both stops closed. Do not run hot water at that sink in the hour before the visit.
The old flexible connectors do not go back on. New supply lines are fitted to the new faucet as part of the job, because the old ones have been compressed onto their fittings for years, and a reused connector is where a slow weep starts.
The Old Mounting Nut Is Usually the Longest Single Step
A deck-mount faucet is not fastened from the top. It sits in its openings and is pulled down against the deck from underneath by a mounting nut threaded onto the faucet's shank. Everything before this point in the visit runs to a pattern. This nut is the part that does not, and what decides how hard it is to get at belongs to the article on why one replacement stays simple, and another does not.
Threads on that shank collect two things. Hard water leaves scale wherever a drop has evaporated, and a faucet base that has been weeping quietly at its seal has been dripping onto those same threads the whole while. Scale and corrosion in the thread between the nut and the shank lock the two together.
Sometimes the nut breaks loose on the first pull and the stage is over almost before it began. Sometimes it moves a fraction of a turn at a time, and the wrench has to be reset for every fraction. Sometimes it does not move at all, and the shank has to be cut instead, which is slower and more careful work because the sink deck sits right against it.
This is the stage that decides whether the visit runs short or long, and none of it is visible from the kitchen side. If your plumber goes quiet under the sink for a stretch, that is usually what is happening.
Setting and Sealing the New Faucet on the Deck
Once the nut is off, the old faucet lifts out from the top and leaves a footprint behind it: a ring of hardened sealant, a crust of mineral where water sat around the base, sometimes a stain in the finish. That footprint gets scraped and wiped down to clean deck before anything new goes on top of it. A new gasket set onto old sealant does not seal. It bridges.
The new faucet goes in with whatever the manufacturer supplied under its base, either a gasket or a bead of sealant, and it gets aligned before it is tightened so the spout swings centered over the bowl.
Then the mounting hardware rises evenly from below. Pulled hard on one side first, the base tips a fraction and the gasket compresses on that side only. It looks fine on the day. The open side is where water sits later and seeps under.
The physical conditions at your particular sink determine whether this stage takes one pass or several, and that list is long enough to warrant an article of its own. What matters for the timeline is that this is a stage where being slow is correct.
The Sprayer Goes On After the Faucet Is Anchored
Nothing gets hooked to a faucet that can still move. Once the base is anchored, the pull-down hose is fed down through the spout and the quick-connect at the bottom is pushed together until it seats and clicks. Then the counterweight is clipped onto the hose at the point where the head retracts cleanly and stops where it should.
A separate side sprayer is hooked up at the same stage but takes a different route. Its hose drops through its own opening in the deck, and where that hose runs matters as much as how it connects. A hose that loops over an angle stop or catches on a cabinet hinge is what makes a sprayer quit retracting weeks later.
If a disposal sits in the cabinet, it is the thing most likely to block that hose's path, and the routing is planned around it.
The Leak Check Is a Run, Not a Glance
The stops open a little at a time, one valve then the other, and the plumber watches each connection as pressure comes on to it rather than opening both and checking afterward. A joint that is going to fail under pressure says so right away.
Then the faucet runs. It sputters and spits at first, because the lines are full of air that has to be pushed out ahead of the water, and that is normal and short-lived. Both handles get worked through their full range. The sprayer gets pulled out, run, and let go so the counterweight can do its work.
While the water is running, every joint is dried with a rag and then watched dry. The dry rag is the test. Water that has been sitting on a fitting since the connection was made tells you nothing; a fitting that beads again after being wiped clean is leaking.
If a joint does weep, it comes apart, gets reseated, and the run happens again from the start. That repeat is not a sign something went wrong. It is the reason the test exists at all.
The last thing that should happen before the cabinet gets loaded back up is that you get to look. The base should be dry and bare, the fittings clean. That inspection is the last stage of the visit, and it is the one every stage before it has been working toward.
Frequently Asked Questions
Not unless you ask. The basket strainer, its strainer ring, the sink seal beneath it, and the tailpiece below are a separate assembly from the faucet, sealed on their own and connected to the trap rather than to the supply lines. They can be handled in the same visit, but only if they are raised when the visit is booked, because those parts come from a different shelf.
From the shutoff test until the leak check, and only at that sink. The stops close before the old faucet is touched and stay closed through every stage in between because each stage ends with an open connection. They come back on one at a time at the end, slowly, so every joint can be watched as pressure arrives on it.
A control box and a battery holder, both mounted on the cabinet wall, with the sensor lead run up to the faucet. Where they go is decided during the visit rather than afterward, because both have to end up somewhere you can still reach. Changing the batteries later is yours to do.
The start and the end are the parts worth being there for. At the start, the cabinet gets shown, and the stops get closed and watched with you standing there, which is the one reading of the day you may want to see for yourself. At the end, the faucet gets run, and every joint gets watched dry. The stretch in between is a plumber on his back under a sink, and there is nothing to see from the kitchen side.
It can, but it is its own job rather than an extension of this one. A kitchen sink swap brings in strainer and trap work, the disposal and dishwasher connections, and countertop cutting where the new sink demands it. The sequence also flips: the faucet gets mounted on the new sink first, on the counter, before the sink is set.
The run at the end is what catches it. The risers are connected to their marked sides, then the faucet is worked from one side to the other with a hand under the stream, which immediately shows a crossed pair. If you ever find hot water arriving on the cold side afterward, it is usually a connection that was swapped at the stops rather than a fault in the faucet. Where the risers check out, the cartridge's rotational seating is the other cause, and that one is covered in the cartridge identification article.
Set a faucet replacement on the calendar and keep the rest of the house in water — the two stops under the sink close; nothing else does. Ser Plumbing repairs drain lines across the area, from drain line repair in Norwalk to Compton. Call (310) 953-3566.
